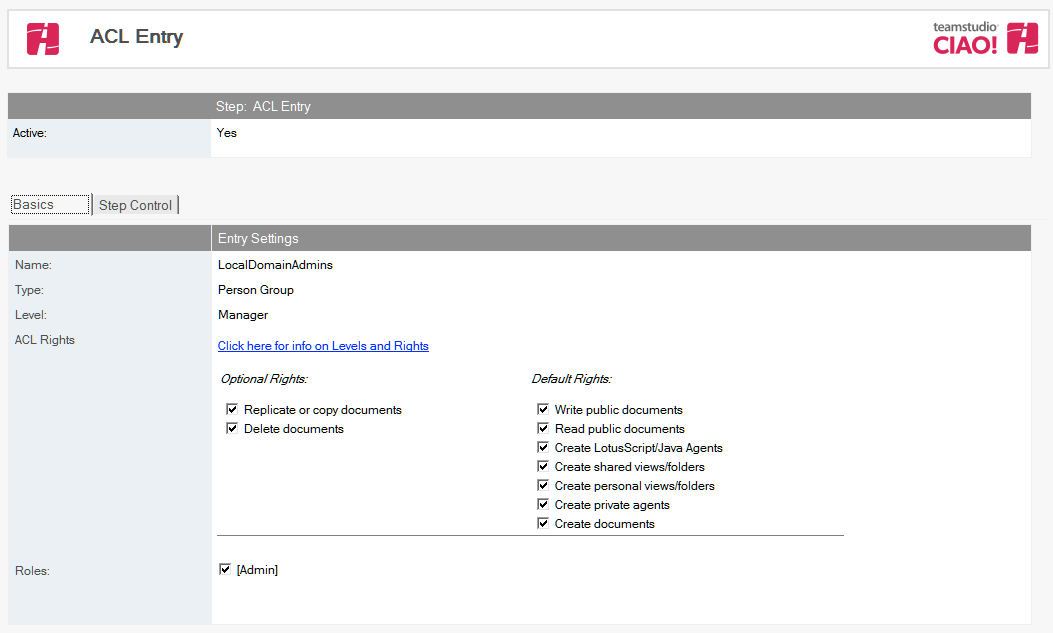
Stored ACL Entry
To create a stored ACL Entry:
- From the Resources tab, choose Resources > Stored ACLs.
- Click the Create Stored ACL Entry action button. The ACL Entry dialog box appears.
- Active is set by default. Do not change this.
- Click the dropdown beside the Name field and select an individual or group.
- Click the dropdown beside the Type field and select the type (for example, unspecified, person, server or mixed group)
- Click the dropdown beside the Level field and select the level (for example, No access, Depositor, Reader or Editor).
- Rights appear based on the type. Select the appropriate rights that you want to assign.
- Select the role(s) from the available checkboxes.
- Save and exit.

To Import an ACL:
- From the Resources tab, choose Resources > Select Stored ACL
- Click the Import ACL action button. The Choose Database dialog box appears.
- Browse to select the database with the ACL you want to import.
- Click Open.
- The requested ACL, along with its attached entries, appears in the list of Stored ACLs.